Cheesecake is one of those desserts that looks fancy and tastes divine, yet many people think it’s too difficult to make at home. The creamy texture, rich flavor, and crumbly buttery base make it feel like something you can only get from a high-end bakery or restaurant. But here’s the truth: with the right steps, anyone can make a perfect cheesecake at home.
This guide will walk you through the entire process, from preparing the crust to baking and chilling the cake, in the simplest, most beginner-friendly way possible. You don’t need professional tools or expensive ingredients. Just your oven, a mixing bowl, a little patience, and a big love for dessert.
So, if you’ve ever dreamed of making a smooth, creamy cheesecake that melts in your mouth, this is your moment. Let’s get baking.
What Exactly Is Cheesecake
Before we dive into the recipe, let’s understand what makes cheesecake special. Cheesecake isn’t a traditional “cake” in the flour-and-butter sense. It’s a rich dessert made mainly from cream cheese, sugar, and eggs, baked on top of a crumb crust (usually made from crushed biscuits or cookies).
There are many types of cheesecakes around the world, from the dense and creamy New York-style to the light and fluffy Japanese version, and even no-bake cheesecakes that set in the fridge instead of the oven.
In this post, we’ll focus on the classic baked cheesecake, the kind that has a smooth, creamy center and a golden top. It’s simple, delicious, and the perfect place to start for beginners.
Ingredients You’ll Need
Let’s start with the basics. Every great cheesecake begins with a few key ingredients, all easy to find in any grocery store.
For the Crust
- 200 grams (about 2 cups) of crushed digestive biscuits or graham crackers
- 100 grams (7 tablespoons) melted butter
- 2 tablespoons sugar (optional, for sweetness)
For the Cheesecake Filling
- 600 grams (about 2 ½ cups) cream cheese, softened
- 1 cup sugar
- 3 large eggs
- 1 cup sour cream or heavy cream
- 2 teaspoons vanilla extract
- 1 tablespoon lemon juice (for a subtle tang)
- 1 tablespoon flour or cornstarch (helps keep it firm and smooth)
Tools You’ll Need
You don’t need a bakery setup to make cheesecake. Here’s all you need
- A 9-inch springform pan (this makes it easier to remove the cheesecake)
- Mixing bowls
- An electric or hand mixer
- Rubber spatula
- Measuring cups and spoons
- Aluminum foil
- A baking tray or roasting pan (for the water bath)
Step 1: Make the Crust
The crust is the foundation of your cheesecake. It adds texture and flavor to every bite, so don’t rush this part.
Crush your biscuits or graham crackers into fine crumbs. You can do this by sealing them in a zip bag and crushing with a rolling pin, or using a food processor if you have one.
In a bowl, mix the crumbs with melted butter and sugar until they resemble damp sand.
Pour the mixture into your springform pan and press it firmly and evenly onto the base (you can use the back of a spoon to flatten it).
Bake the crust at 325°F (160°C) for 10 minutes. This helps it firm up and gives it that toasty flavor.
Let it cool completely before adding the filling.
Tip: You can also make chocolate or Oreo crusts by using chocolate biscuits instead of graham crackers.
Step 2: Prepare the Cheesecake Filling
This is where the magic happens, the smooth, creamy heart of your cheesecake.
In a large bowl, beat the cream cheese until it’s smooth and lump-free. Make sure your cream cheese is at room temperature; cold cheese can make the batter lumpy.
Add sugar and mix until combined.
Beat in eggs one at a time. Mix each egg just until it’s blended before adding the next.
Add sour cream (or heavy cream), vanilla extract, and lemon juice. Mix gently.
Finally, add a tablespoon of flour or cornstarch. This helps prevent cracks on top during baking.
When done, your batter should be thick, silky, and smooth. Don’t overmix — too much air can cause cracks later.
Step 3: Pour and Prepare for Baking
- Now that your crust is cool and your batter is ready, it’s time to put everything together.
- Pour the cheesecake filling over the crust in the springform pan.
- Tap the pan gently on the counter to release any air bubbles.
- Wrap the bottom of the pan tightly with aluminum foil to prevent leaks.
Step 4: Bake in a Water Bath
This might sound fancy, but it’s simple. A water bath (bain-marie) ensures the cheesecake bakes gently and evenly without cracking.
- Place your wrapped cheesecake pan inside a larger roasting pan.
- Pour hot water into the roasting pan until it reaches halfway up the sides of the cheesecake pan.
- Bake in a preheated oven at 325°F (160°C) for about 55–70 minutes.
- The cheesecake is done when the edges look set, but the center still jiggles slightly when you shake it gently. It will firm up as it cools.
Step 5: Cooling the Cheesecake
This step is crucial; don’t rush it. Rapid cooling can cause cracks.
Once baked, turn off the oven and leave the cheesecake inside with the door slightly open for about 1 hour.
After that, remove it from the oven and let it cool to room temperature.
Once cool, cover it with plastic wrap and refrigerate for at least 4 hours (overnight is even better).
This chilling time allows the flavors to develop and the texture to set beautifully.
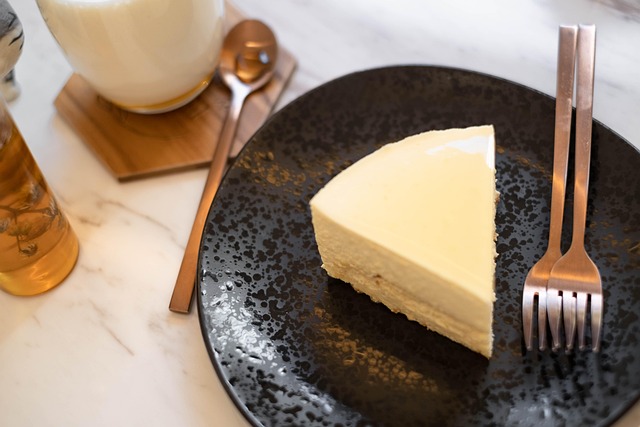
Step 6: Serve and Enjoy
When your cheesecake is chilled and set, carefully remove it from the springform pan. Slice it with a sharp knife, wiping the knife clean between cuts for perfect slices.
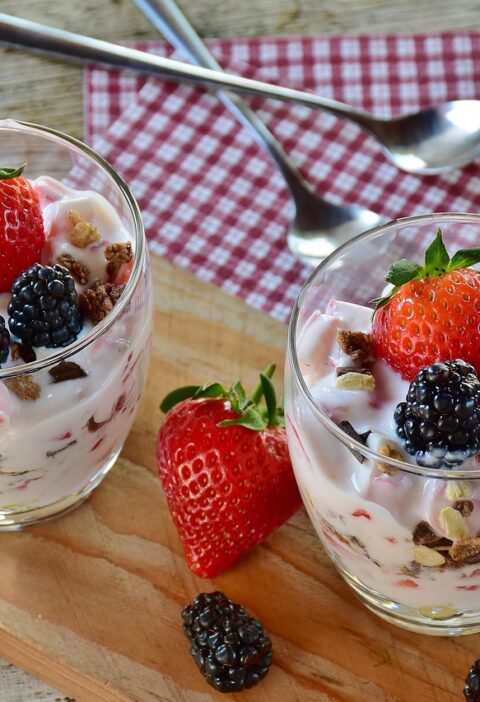
- You can enjoy it plain or dress it up with delicious toppings like
- Fresh berries (strawberries, blueberries, raspberries)
- Fruit compote or jam
- Chocolate or caramel sauce
- Whipped cream
- Crushed nuts or cookie crumbs
- Each topping adds its own touch of flavor and beauty to your cheesecake.
Common Mistakes Beginners Make (and How to Avoid Them)
Even experienced bakers sometimes struggle with cheesecake. Here’s how to avoid common pitfalls
1. Cracks on the Surface
- Cracks usually happen because of overmixing or sudden temperature changes.
- Don’t overbeat the batter.
- Use a water bath for gentle baking.
- Let it cool slowly.
2. Soggy Crust
This happens if water leaks into your pan during baking.
Always wrap the bottom of your springform pan tightly with foil.
You can also place the pan inside an oven-safe bag for extra protection.
3. Overbaking
A cheesecake should still jiggle slightly in the center when done. If you bake it until it’s completely firm, it’ll turn dry.
4. Lumpy Batter
Always use room temperature ingredients, especially cream cheese and eggs.
5. Cutting Too Soon
Cheesecake needs time to chill and firm up. Cutting it too early will make it messy and soft.
Variations You Can Try
Once you’ve mastered the classic cheesecake, try adding some creativity to your recipe. Here are a few fun variations that always impress
1. Chocolate Cheesecake
Add ½ cup of melted dark chocolate or cocoa powder to your filling for a rich, chocolaty twist.
2. Strawberry Swirl Cheesecake
Swirl strawberry jam or puree into the top of the batter before baking for a beautiful marble effect.
3. Lemon Cheesecake
Add extra lemon zest and juice for a bright, tangy flavor that feels refreshing and light.
4. Oreo Cheesecake
Mix crushed Oreo cookies into both your crust and batter. It’s a crowd-pleaser every time.
5. No-Bake Cheesecake
If you don’t want to use the oven, mix your filling and let it set in the fridge for 6–8 hours instead. It’s lighter but still delicious.
How to Store Cheesecake Properly
If you have leftovers (which rarely happens), you can easily store cheesecake and enjoy it later.
In the fridge, cover it tightly with plastic wrap or store it in an airtight container for up to 5 days.
In the freezer, Cheesecake freezes beautifully. Slice it and wrap each piece individually in plastic wrap, then store in a freezer-safe bag. It will last up to 2 months. To serve, thaw in the fridge overnight.
Helpful Tips for Perfect Cheesecake Every Time
Always grease the sides of your pan lightly before baking; it helps the cake release smoothly.
Use full-fat cream cheese for the best texture. Low-fat versions may not set properly.
If your cheesecake cracks, don’t worry, cover it with fruit topping or whipped cream. It’ll still taste amazing.
Don’t skip the resting and chilling stages. Cheesecake gets its smooth texture from slow cooling and proper refrigeration.
To slice neatly, dip your knife in hot water before cutting each slice.
Why You’ll Love Homemade Cheesecake
There’s something deeply satisfying about baking your own cheesecake. It’s not just about the taste, though it’s rich, creamy, and decadent. It’s also about the process. You learn patience, precision, and the joy of creating something beautiful from scratch.
Homemade cheesecake is also customizable. You can make it light or dense, fruity or chocolaty, baked or no-bake; there’s a version for everyone. And once you make your first successful cheesecake, you’ll never want to buy one again.
Imagine serving a slice of your homemade cheesecake to family or friends and hearing them say, “Wait, you made this.” That feeling of pride and accomplishment is worth every minute spent in the kitchen.
Conclusion
Making cheesecake at home doesn’t need to be intimidating. When you break it down into simple steps, making the crust, mixing the filling, baking gently, and chilling patiently, you’ll realize it’s one of the easiest desserts to master.
So, the next time you’re craving something rich and indulgent, skip the store-bought version. Put on your apron, gather your ingredients, and bake your own cheesecake masterpiece. Once you taste that creamy perfection, you’ll wonder why you didn’t try it sooner.
Because at the end of the day, baking is not only about food, it’s about joy, creativity, and the little moments that make life sweeter.